The Character Made in Blender Was Broken in Three.js — A Retrospective on 3D Character Implementation
A record of the issues faced when putting characters on Three.js for the Funda project and personal portfolio
A record of the issues faced when putting characters on Three.js for the Funda project and personal portfolio
The password you enter is used to open, edit, and delete secret comments.
Why were characters needed?
From Modeling to Rigging
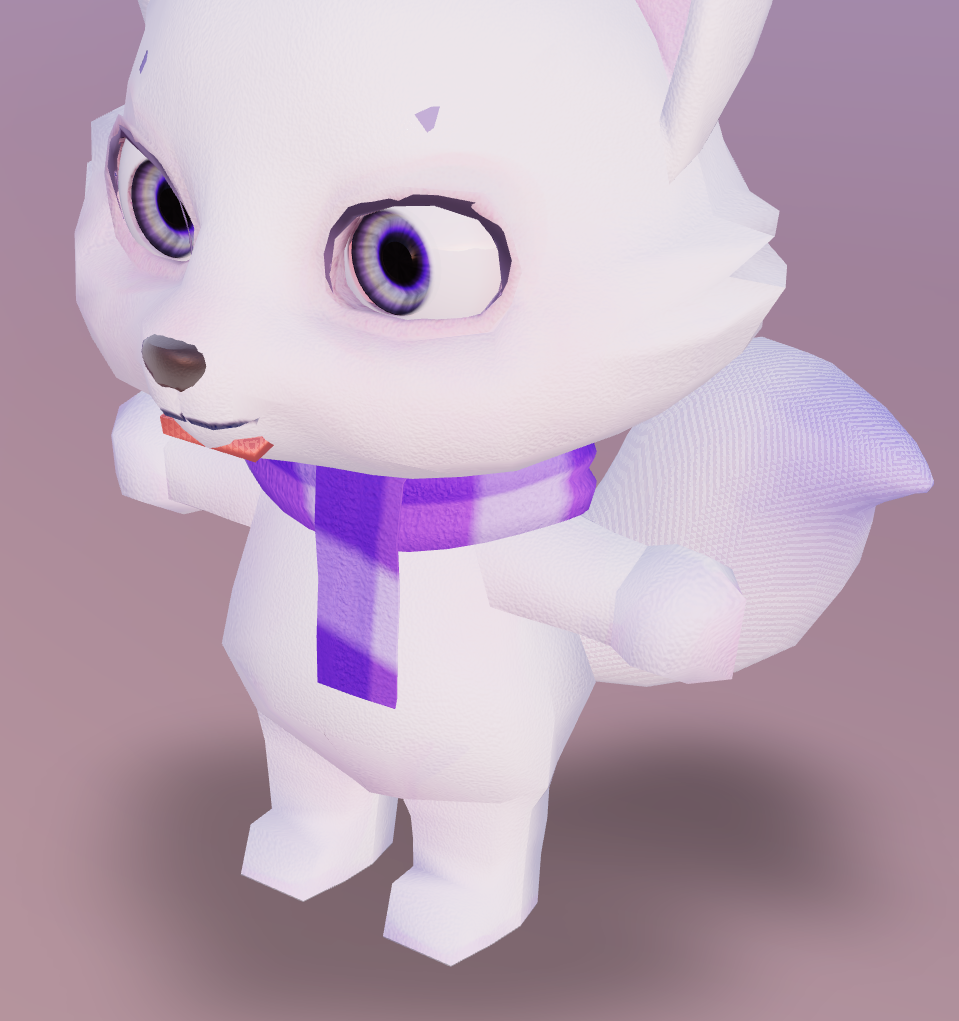
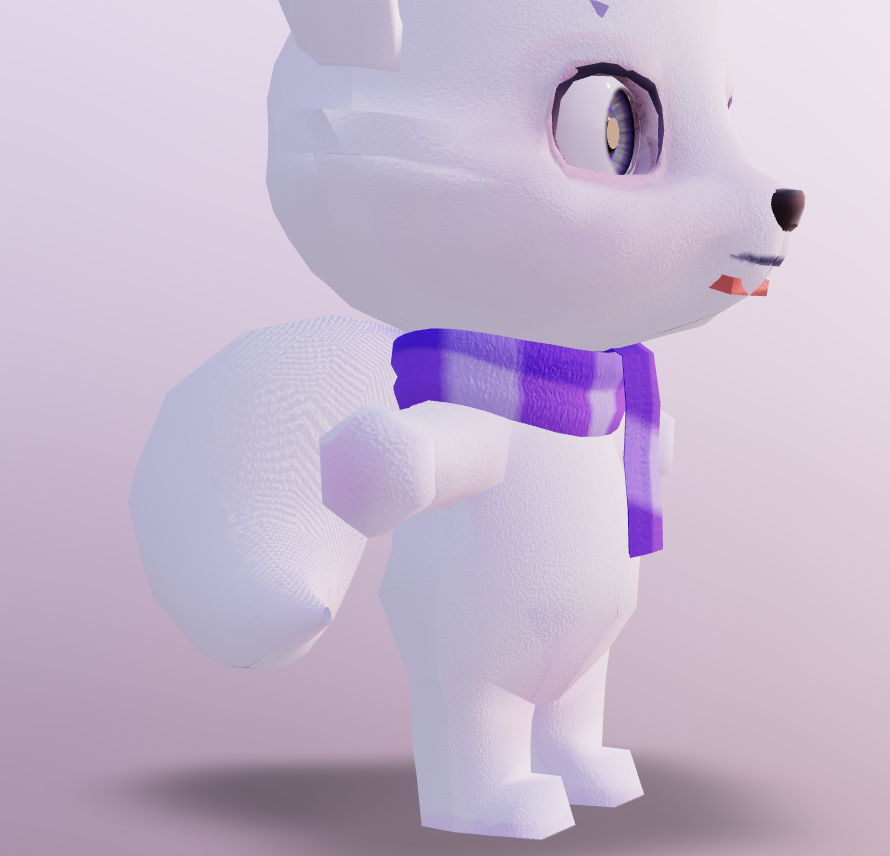
Rendering in low poly as subdivision, which smoothens the mesh, was not applied
The Magic of Shading with Fake High Poly
Texture Retouch Instead of Refraction
Reducing Draw Calls
TL;DR
Understanding engine limitations: A perfect structure in Blender is not always the correct answer in Three.js.
Result-oriented rigging: Rigging is not just about "bringing in" but about the process of "converting to result data" for the engine.
Design centered: All criteria should focus on "how it operates efficiently at web runtime."
The portfolios of the two projects mentioned in this article can be viewed at Funda, Chaen.
During the FUNDA project, there was a need for a medium that visually reflects the core values of 'fun' and 'gamification' of the service. Not just decorations to adorn the screen, but characters were planned as UX components that emotionally connect with users and motivate learning.
Characters were selected based on three criteria.
Initially, we considered a panda, which sounds similar to 'Funda.' While pandas appealed for their cuteness, they seemed more fitting for a 'leisure' category than the 'intelligent' 'learning' category, so we held off.
Next, we thought about an otter, but considering an appearance closer to human form would be better for pondering animation, we kept it as a candidate.
Finally, the fox matched well with the smart image, developers, and learning, but the orange color clashed with the brand's colors, leading us to finally choose the arctic fox, which also belongs to the fox family.
 |  |  |
|---|
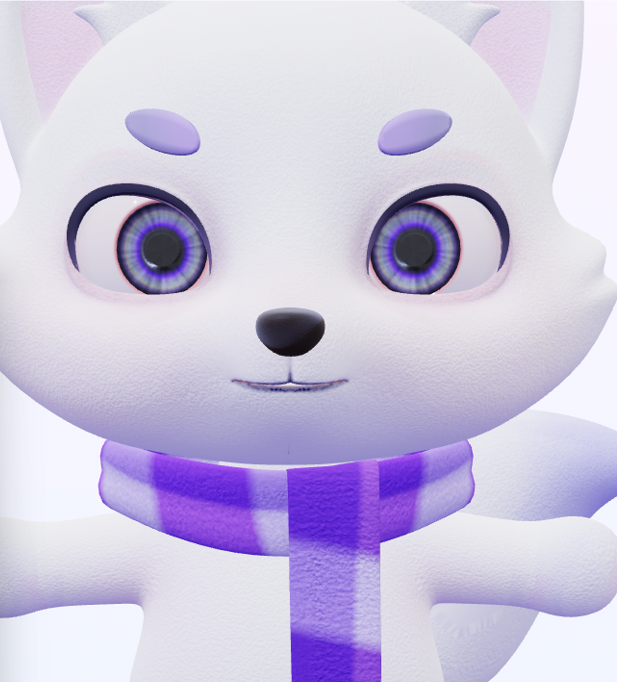
Before starting full-scale 3D work, simple sketches and 2D implementations were done to decide the character's impression and dynamics. Although the 2D results did not seem to have major indicative issues for the service operation itself, feedback mentioned a slight lack of quality.
There was a lot of deliberation between the working time (Resource) and the quality of the outcomes, but it was concluded that the character was the key point of this project. If it's a crucial element that determines the project's success, investing more time to ensure solid quality was deemed right, thus beginning the challenge towards 3D characters.
Instead of indiscriminately increasing faces, I used the strategies of Weighted Normal and High Poly Normal Map Baking.
The previous approach of applying a glass layer over the eyeballs was too heavy. This time, the eyeball mesh was unified, and details were baked into the texture. Refraction calculations were replaced by directly drawing highlights and depth in Photoshop. This choice aimed to reduce rendering load while maintaining visual satisfaction.
This was carried out based on the experience of implementing human characters twice. The deform was modified several times to capture the details. Most of the texturing was done using noise, but parts requiring detail were sourced from Poly Haven.
| First Head | Second Deform | Third Deform |
|---|---|---|
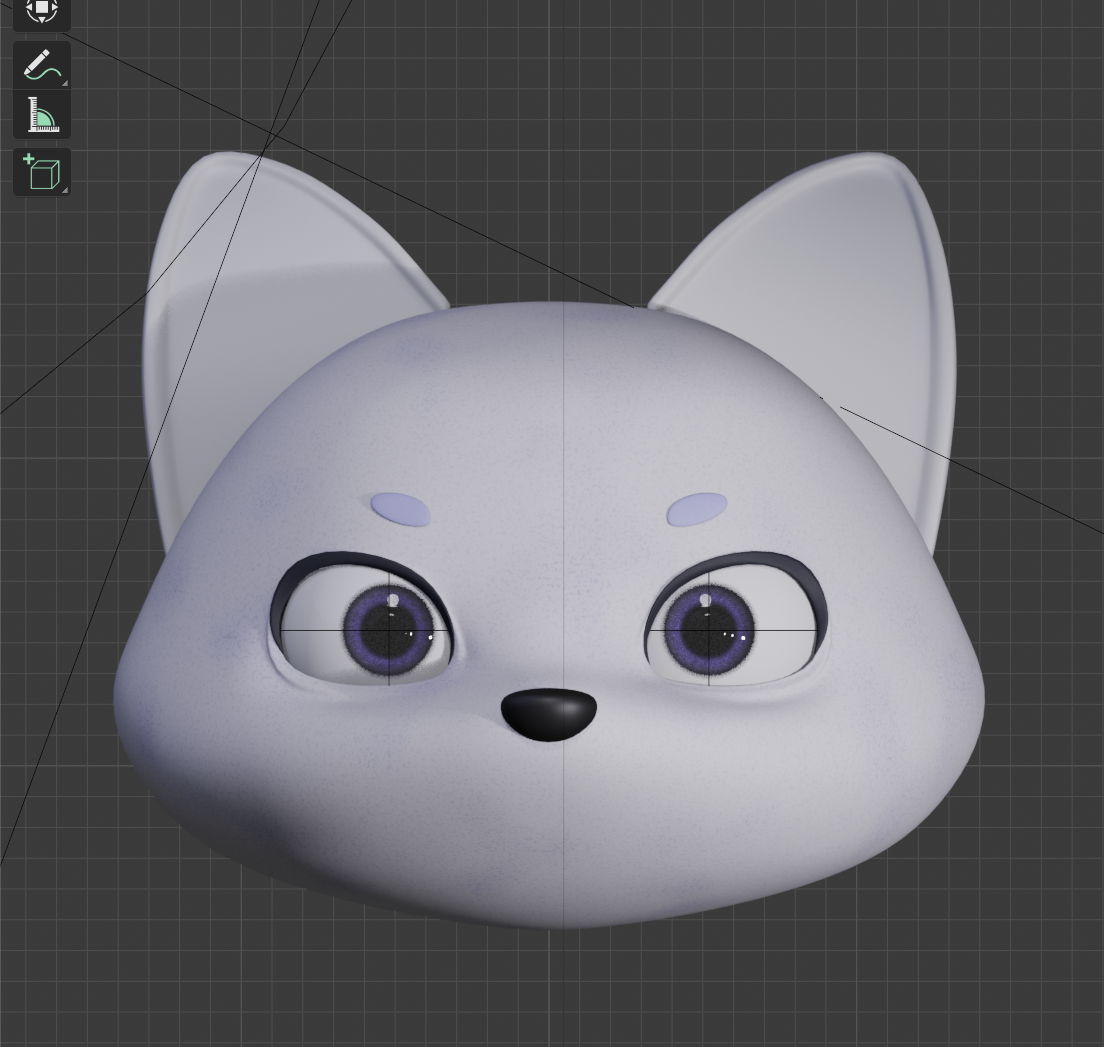 | 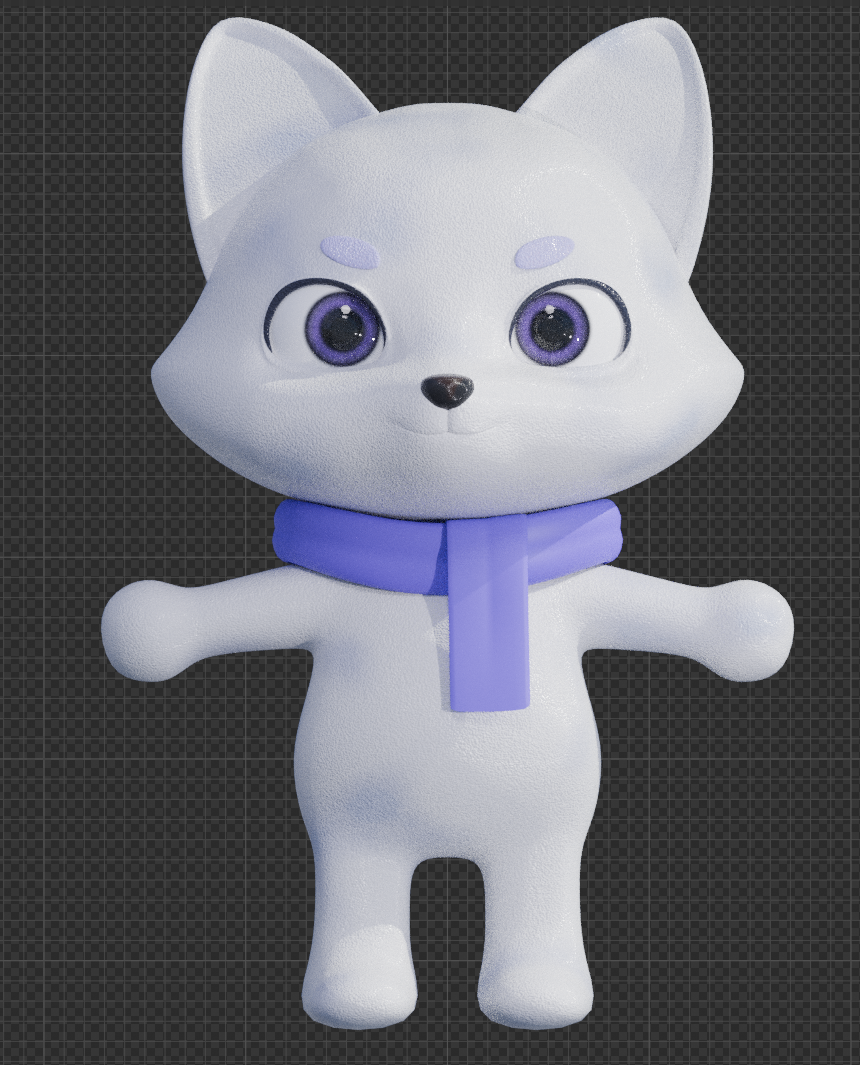 | 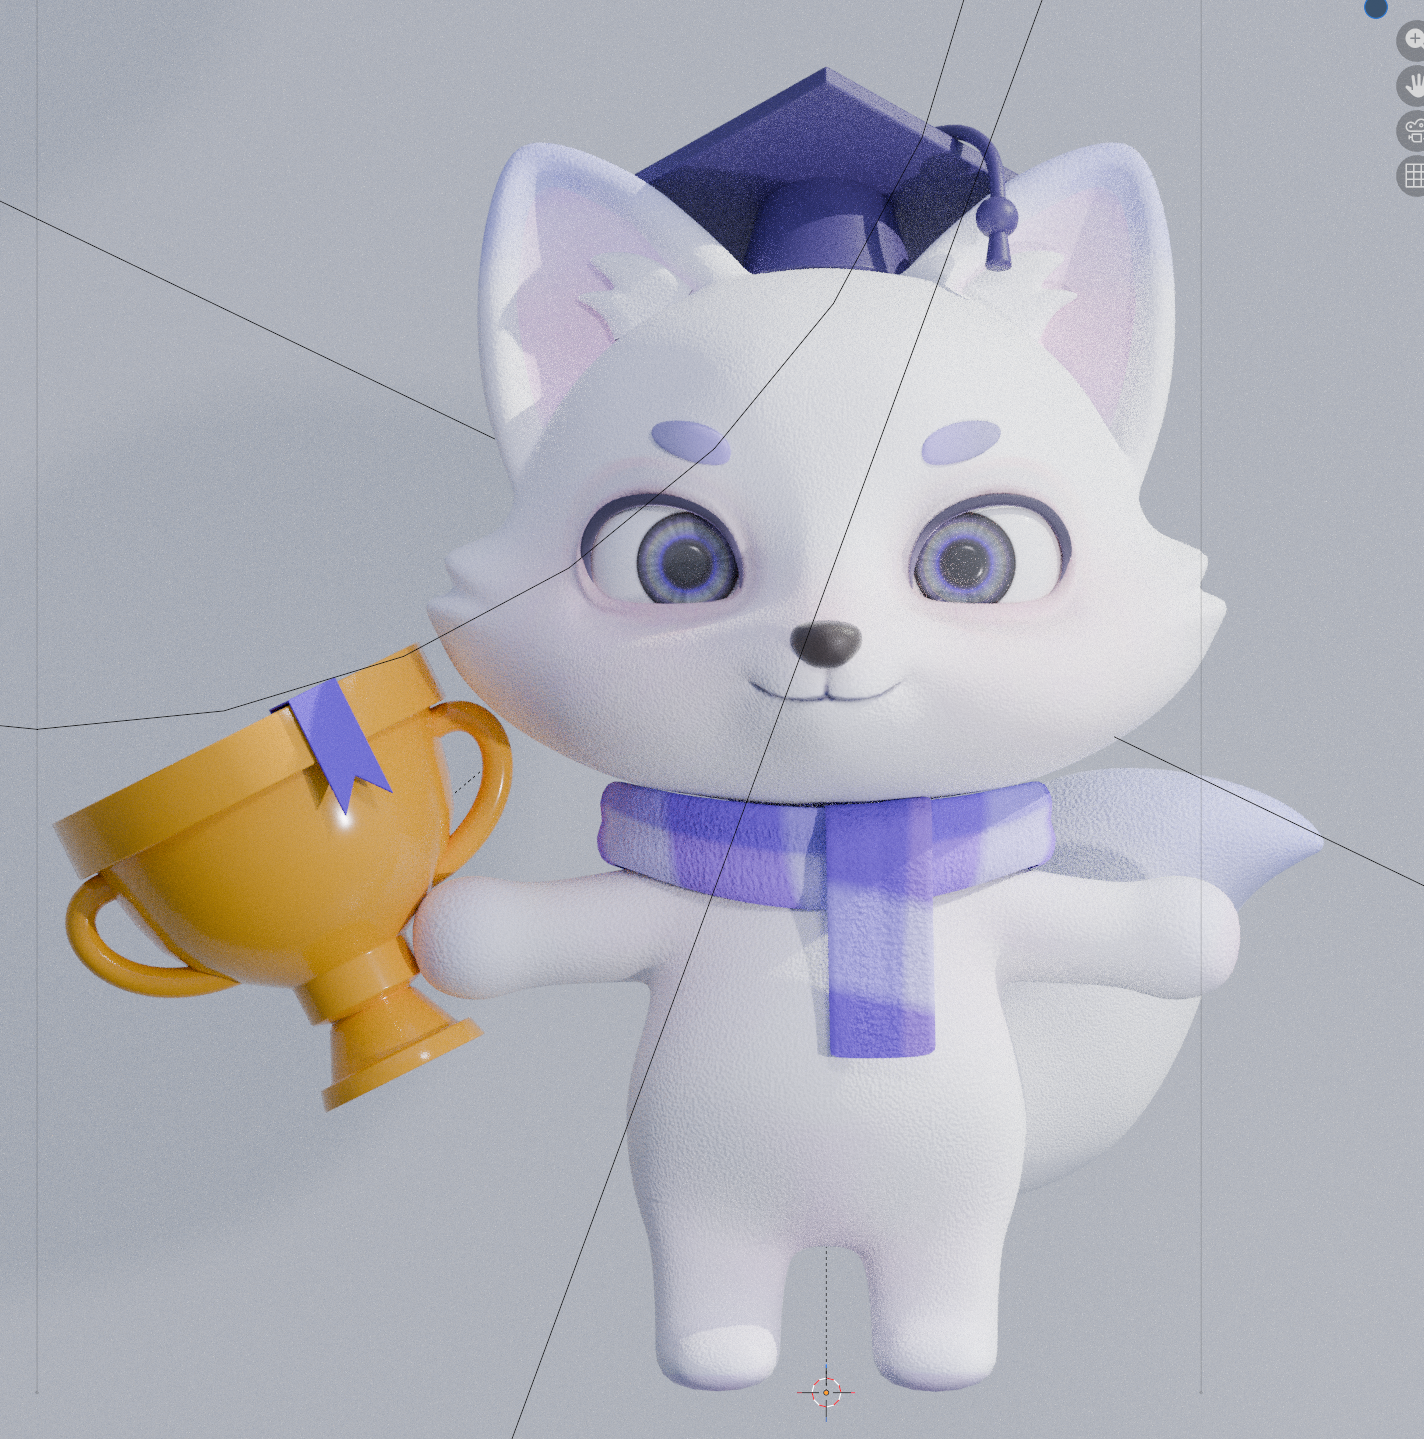 |
Particularly, the eyes received the most attention. To capture the mystical nature of the Arctic fox, a combination of purple and white was used, and the Transmission and Glass BSDF were utilized to create a glass-like refraction effect. However, this node structure later became a significant technical challenge in the Three.js environment. (to be discussed later)

Rigging was done using the animal head + human body structure based on Rigify. The Damped Track was applied to add swaying to the scarf and tail. Facial expressions were controlled by assigning Shape Keys to the face mesh, eyelashes, eyebrows, tongue, and teeth.
| body rigging | facial expression |
|---|---|
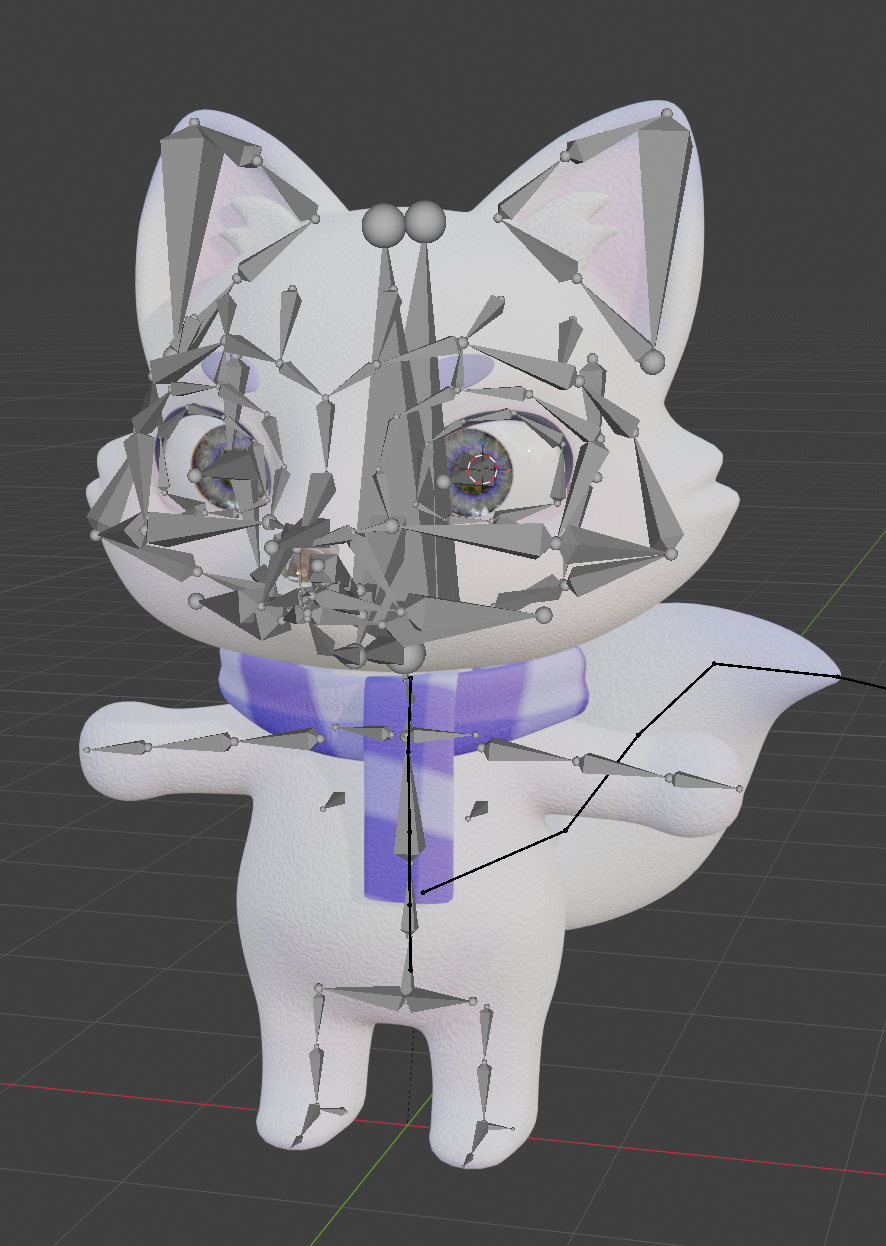 | 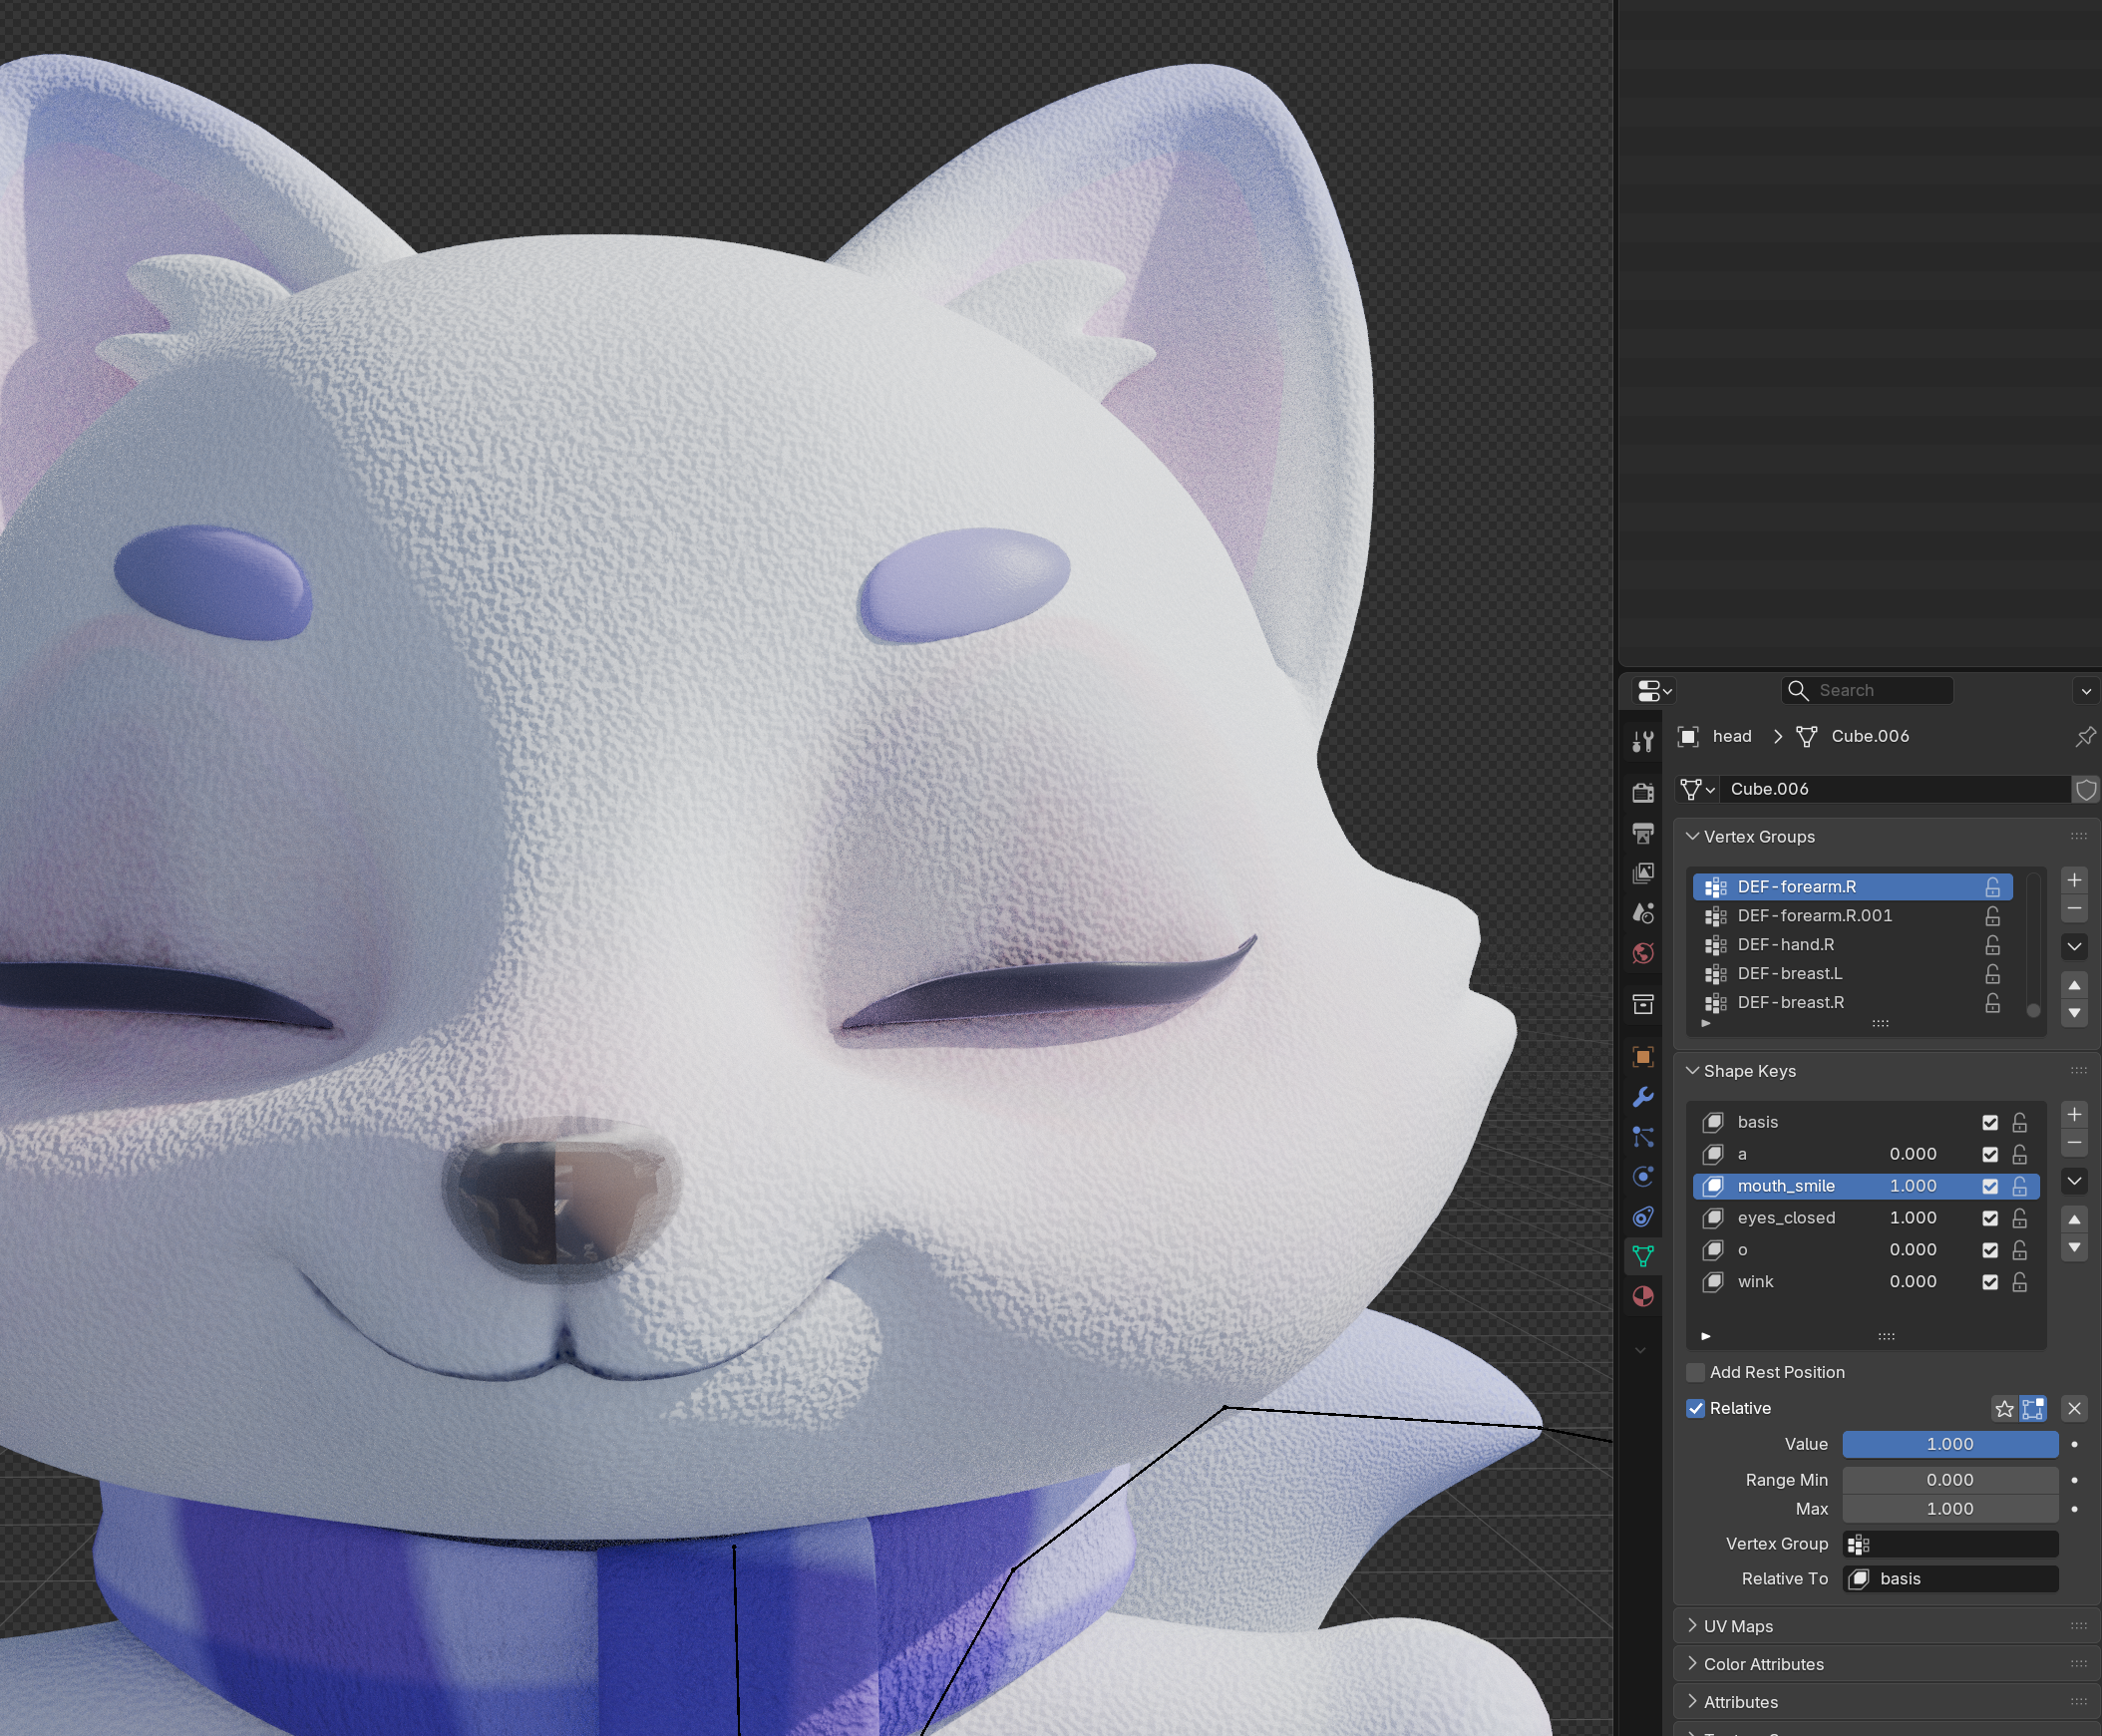 |
In Blender, everything worked perfectly, and it just needed to be exported. The problems arose afterward.
When uploaded to the web, it rendered without any modifiers applied. Three.js does not support real-time modifier calculation for each frame. Back in Blender, modifiers needed to be applied, but there was an error that meshes with Shape Keys cannot have Subdivision Modifier applied successfully.
 |  |
|---|
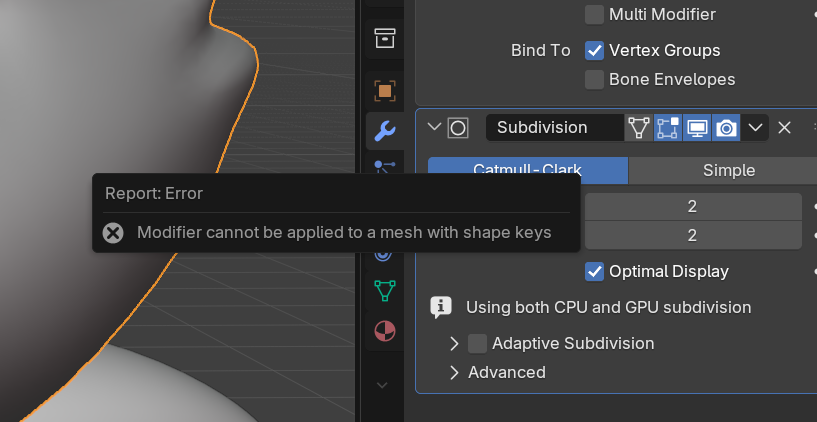
Having recreated the Shape Keys more than five times, starting over was not an option due to time constraints. Eventually, I used an external plugin (SKKeeper) for forced application. Many error messages appeared stating that the Shape Key was missing, but upon transitioning to threejs, there seemed to be no issues on the screen, and the modifiers were applied well. However, since it wasn't the proper method, unease remained.
The Rigify-based IK and Constraint structures were completely ignored in Three.js. None of the intended movements were realized. It was expected when only the deform bone was exported, but even when exporting other MCH, ORG, DEF bones to recognize and control, they did not move at all. In Blender, real-time bone control through the Controller was possible. In contrast, in Three.js, the controller was entirely ignored.
Rigify bones were imported to be directly controlled, but did not behave as intended. Attempted to extract the bones multiple times, which took a long time, so I wrote five scripts to debug them in order.
Result: Bones were all present, mapping was done, and coordinate values moved, but it was not reflected on the screen.
In conclusion, I realized that Rigify's structure is too complex to be directly controlled in Three.js. Only elements not directly connected to Rigify, such as eyeballs, eyebrows, and tongues parented to the head bone, could be moved.
When implementing the 'eyes' that determine a character's liveliness, encountered a technical bottleneck where the sophisticated node design in Blender did not work as intended in a web engine (Three.js).
However, when exported to GLB and checked in Three.js, the intent in Blender was completely collapsed.
Determining that image baking alone could not replicate the physical glass texture on the web, we chose to inject MeshPhysicalMaterial directly at runtime.
MeshPhysicalMaterial supports the most physically accurate material expression in Three.js. By setting parameters such as IOR (refractive index), Transmission, and Coat, we were able to replicate results similar to Blender's Glass material at runtime. Although not identical, the intended mysterious eye expression was sufficiently achieved.
| before | after |
|---|---|
 |  |
Removed constraint-based rigging and baked all animations into frame-by-frame keyframe data. In the Dope Sheet and Action Editor, each action was organized and then pushed down to the NLA (Non-Linear Animation) Editor to manage tracks. Since clear clip names are necessary to trigger specific animations in the engine, all action names were refined and baked before extraction. This allowed animation control without confusion, such as actions['Greeting'].play() at the code level.
Interactions became possible after these two were separated.
useFixSkinnedMesh Custom HookNew issues arose in Three.js after forced Subdivision application.
A custom hook was created to address these.
As the project progressed, additional features like character eye tracking and click-triggered animations were added. The main concern was 'how much to bake'.
Baking all movements in Blender for implementation makes things much simpler. However, doing so equates to a non-interactive, merely 'play button' GIF. Ideally, various expression combinations would be reused flexibly according to the situation.
Therefore, a hybrid strategy was set as follows:
Additionally, a separate controller component and character experience page were built, allowing users to directly manipulate the controller to experience various animations and expression changes in real-time.
링크 정보를 불러오는 중...
Using the hybrid approach, issues arose where different control entities (animation data vs real-time mouse coordinates) conflicted, resolved by applying two exceptions.
If the gaze follows the mouse while certain animations (e.g., falling, greeting) play, the rotation value of the bones defined by animation data collides with real-time lookAt logic, causing screen jitter or unnatural movements. A flag was designed to temporarily block gaze tracking logic while active animations are executing.
Expressions can overlap. If the 'smiling expression' weight is at 1 and 'angry expression' is set to 1, the mesh might distort grotesquely. To prevent this, a logic was implemented to precisely reset the Shape Key influences of the previous group to 0 before injecting new values when switching to a new expression group.
Due to the structure where 3D characters are placed on many pages (battle, login, result screen, etc.), mobile performance was important. To prevent frame drops (FPS reduction) on low-end devices, we approached it from various angles.
requestAnimationFrameThe basic render loop of Three.js was configured based on requestAnimationFrame. This method executes callbacks right before the browser draws the next frame, naturally matching the monitor's refresh rate (60Hz, 120Hz, etc.). When the tab moves to the background, it automatically pauses, reducing unnecessary calculations.
renderer.setPixelRatio(Math.min(devicePixelRatio, 2))The latest mobile devices can reach a pixel density (DPR) of 3 to 4. The higher the DPR, the square of the number of pixels the GPU needs to process increases. We limited the DPR to a maximum of 2 to secure performance without a significant visual difference.
antialias: falseAnti-aliasing reduces jagged edges but imposes a significant load on the GPU. In mobile environments, the high DPR already makes jagged edges less noticeable. Disabling it did not result in a major perceived quality difference, so we turned it off.
While working in Blender, temporary animation tracks like [Action Stash] can accumulate in the NLA Editor. If included when exporting to GLB, the file size unnecessarily increases, and Three.js wastes memory parsing all tracks during loading. Therefore, we deleted all unused tracks before exporting.
Procedural shaders like Blender's Principled BSDF, Noise, and Gradient cannot be calculated in real-time in Three.js. By baking them into image textures before GLB export, Three.js only needs to apply the texture images. This greatly reduces the cost of real-time lighting and shader operations.
Baking targets: Color, Roughness, Normal, Alpha maps
SkeletonUtils.cloneSince the same character is used on multiple pages (battle, result screen, etc.), we reused it in an instancing manner instead of loading it anew each time. Simply using scene.clone() would mess up the bone structure, causing animations to apply redundantly to all instances. To address this, we used SkeletonUtils.clone to implement a structure where geometries are shared but skeletons are independently cloned.
Lighting settings and camera controls were not reconfigured for each page but were made into a single scene component for reuse. In the React structure, the same components share memory, reducing the cost of duplicate rendering.
The mesh itself is high-polygon, which limited runtime optimization, and there was plenty of room for additional refinement at the Blender stage. If LOD (Level of Detail) had been applied, it would have automatically reduced polygon counts based on the distance from the camera, potentially boosting mobile performance. It's a feature I'd like to implement in the next project.

The performance bottlenecks experienced with the first character 'Pundi' taught me significant lessons. In a web environment, 3D models aren't just 'pretty models' but must be 'meticulously calculated assets.' For this human character project, the optimization pipeline was applied from the design stage.
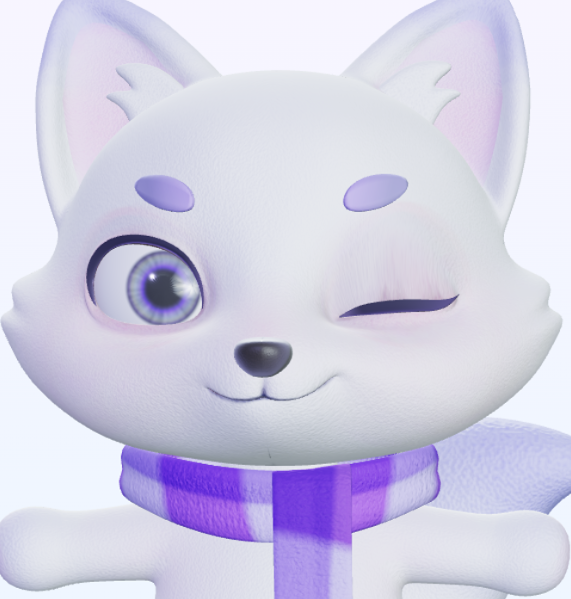
In the past, dozens of images were used per part, burdening the engine. This time, similar materials like face + torso, clothing parts, accessories, and interior, were integrated into three 2048px atlases.
In the PBR workflow, Occlusion, Roughness, and Metalness each require separate textures. However, three textures mean three times the GPU memory and network transmission.
Focusing on the fact that all three datasets are grayscale data with values from 0 to 1, they were packed into the R (AO), G (Roughness), B (Metallic) channels within a single image.
Instead of using a separate tool, I used Node.js and the sharp library to write a script for pipeline automation, which turned out to be much more efficient than expected.
Using sharp, you can batch-process dozens of textures. Especially for cases requiring an alpha channel, like hair, it can be managed by expanding to ORMA.
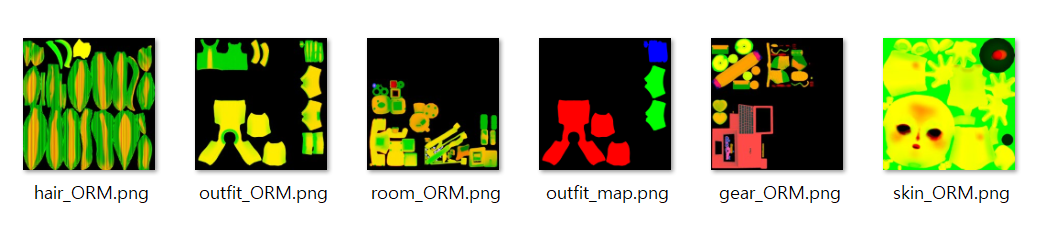
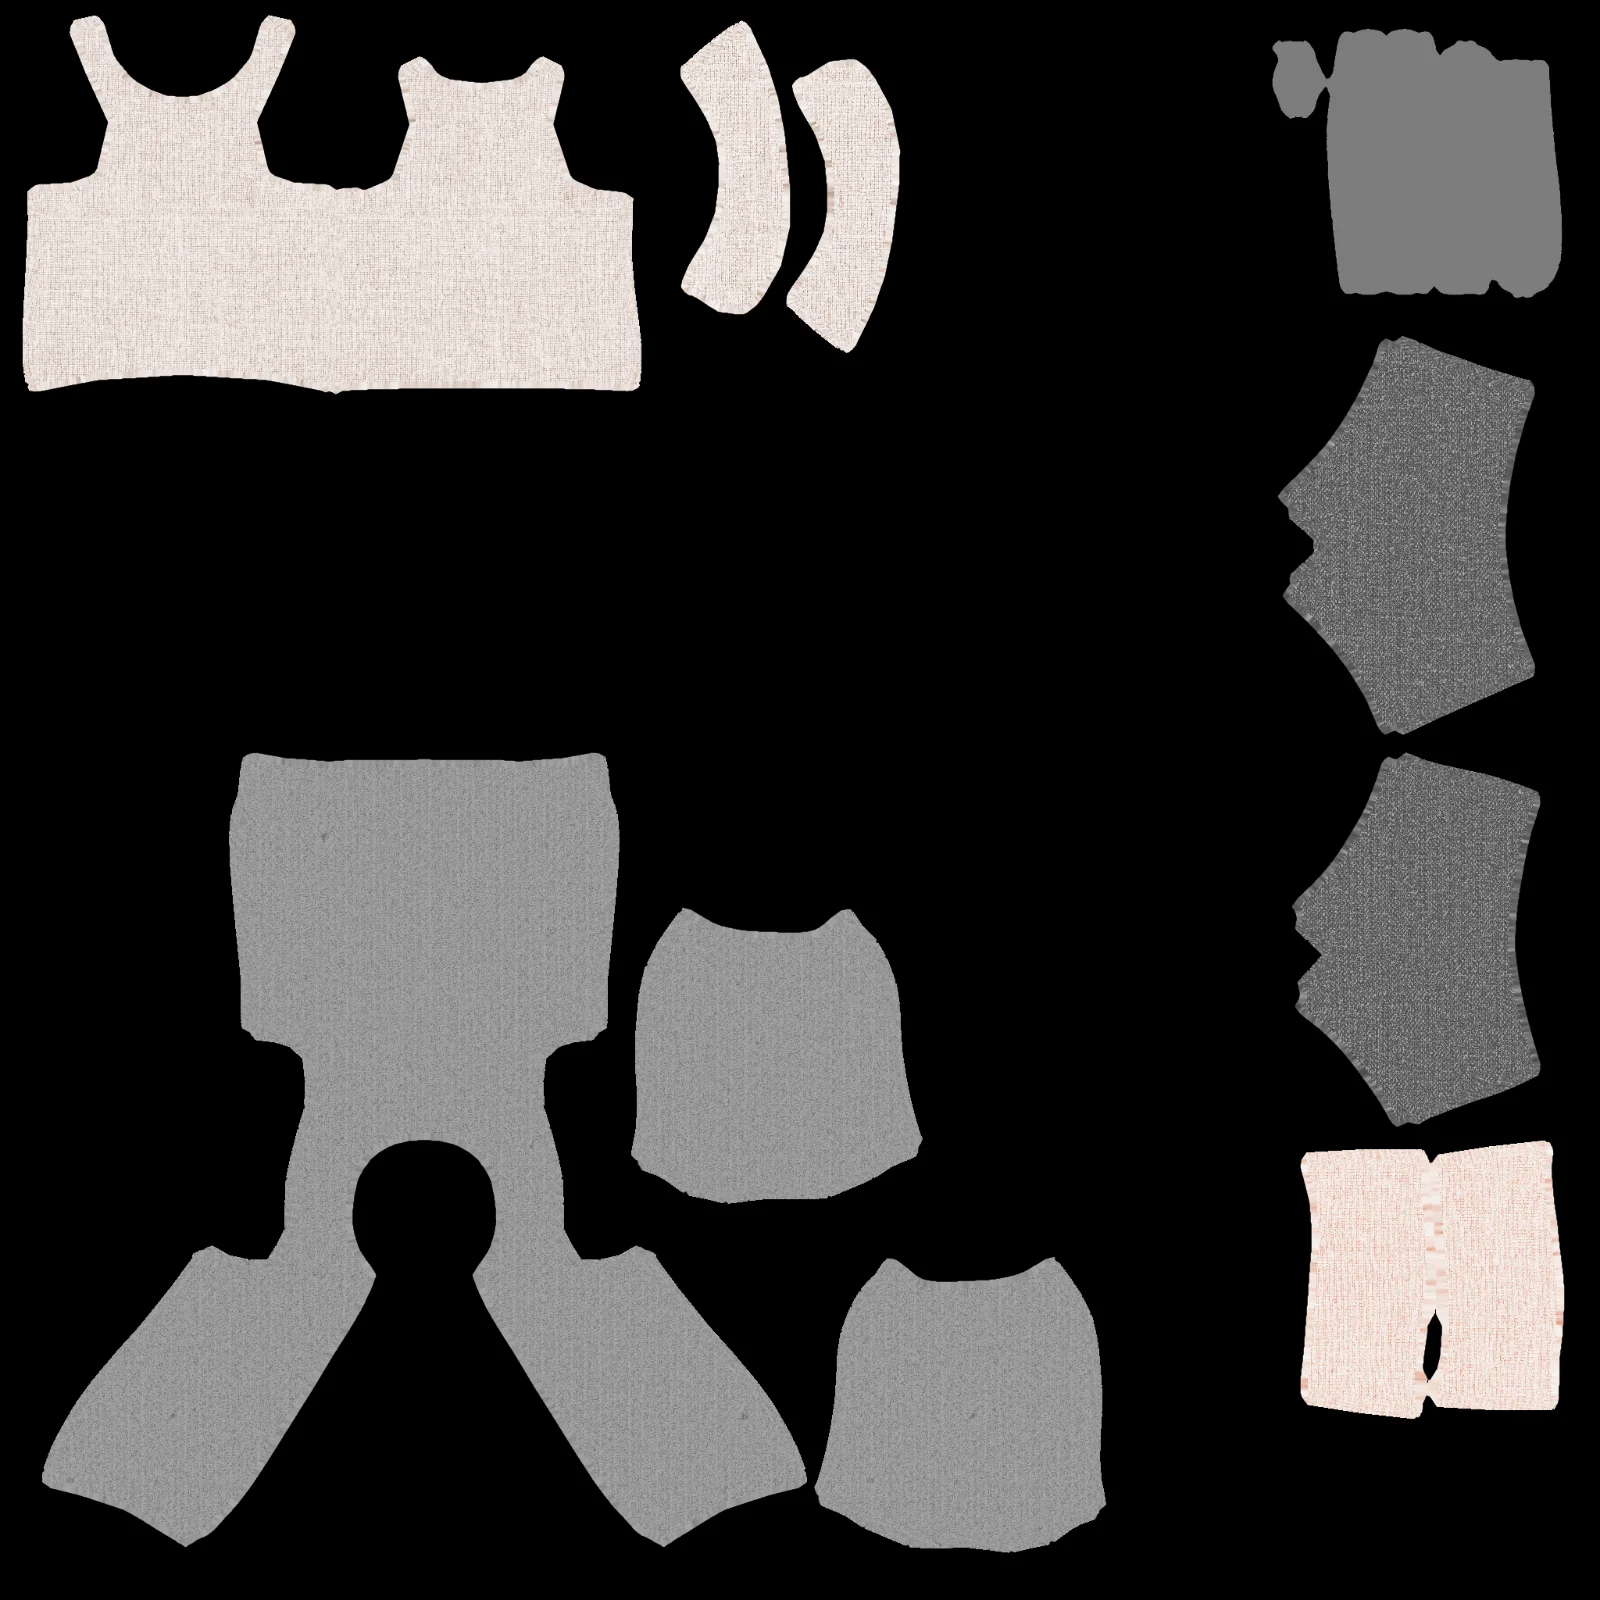
Hair and outerwear, which frequently change color, were baked in black and white, then directly injected with material.color.set() in Three.js runtime to save memory and secure customization flexibility.
| Grayscale | Color Mapping |
|---|---|
 |  |
To prevent user drop-off, Draco compression in Blender was used to export and unpacked in Three.js, which reduced the model size by over 80%, significantly shortening network loading times.
The conclusion from this work is that 3D character creation is not a modeling problem, but a structural design problem tailored to the execution environment.
A structure that works perfectly in Blender may be meaningless in Three.js. Conversely, even if it's slightly inconvenient in Blender, designing it in a way that can be controlled by the engine yields much better results. Thanks to the trial-and-error with the first character, the second character could be created properly from the start. The experience of working hard in the wrong direction ultimately established the correct design criteria.
=== 🔍 DEBUG 1: Check Bone Presence ===

debug1.tsx:45 ✅ hand_ik.L: {type: 'Bone', isBone: true, rotation: 'x:1.64 y:-0.03 z:-1.66'}
debug1.tsx:45 ✅ hand_ik.R: {type: 'Bone', isBone: true, rotation: 'x:1.64 y:0.03 z:1.66'}
debug1.tsx:45 ✅ hips: {type: 'Bone', isBone: true, rotation: 'x:0.00 y:0.00 z:0.00'}
debug1.tsx:45 ✅ torso: {type: 'Bone', isBone: true, rotation: 'x:0.00 y:0.00 z:0.00'}
debug1.tsx:45 ✅ tail: {type: 'SkinnedMesh', isBone: false, rotation: 'x:0.00 y:0.00 z:0.00'}
debug1.tsx:45 ✅ tail001: {type: 'Bone', isBone: true, rotation: 'x:0.69 y:-0.09 z:0.37'}
debug1.tsx:45 ✅ tail002: {type: 'Bone', isBone: true, rotation: 'x:0.75 y:-0.19 z:-0.33'}
debug1.tsx:45 ✅ tail003: {type: 'Bone', isBone: true, rotation: 'x:-0.48 y:-0.27 z:-0.73'}
debug1.tsx:45 ✅ tail004: {type: 'Bone', isBone: true, rotation: 'x:-0.33 y:-0.04 z:-0.06'}
debug1.tsx:45 ✅ ear.L: {type: 'Bone', isBone: true, rotation: 'x:0.00 y:0.00 z:0.00'}
debug1.tsx:45 ✅ ear.R: {type: 'Bone', isBone: true, rotation: 'x:0.00 y:0.00 z:0.00'}
debug1.tsx:45 ✅ head: {type: 'Bone', isBone: true, rotation: 'x:1.41 y:-0.00 z:0.00'}
debug1.tsx:45 ✅ MCH-eye_commonparent: {type: 'Bone', isBone: true, rotation: 'x:-1.57 y:0.00 z:0.00'}

debug1.tsx:147 👀 Gaze Tracking: {headCommon_x: '-1.571', headCommon_y: '0.000', pointer: 'x:-0.42 y:0.35'}
debug1.tsx:160 🔄 Auto-Rotation: {head_y: '-0.054'}
debug1.tsx:160 🔄 Auto-Rotation: {head_y: '0.134'}
debug1.tsx:160 🔄 Auto-Rotation: {head_y: '0.197'}
debug1.tsx:147 👀 Gaze Tracking: {headCommon_x: '-1.571', headCommon_y: '0.000', pointer: 'x:-0.04 y:0.19'}
debug1.tsx:147 👀 Gaze Tracking: {headCommon_x: '-1.571', headCommon_y: '0.000', pointer: 'x:0.62 y:0.74'}
debug1.tsx:147 👀 Gaze Tracking: {headCommon_x: '-1.571', headCommon_y: '0.000', pointer: 'x:0.65 y:0.75'}
debug1.tsx:147 👀 Gaze Tracking: {headCommon_x: '-1.571', headCommon_y: '0.000', pointer: 'x:-0.07 y:0.91'}
debug1.tsx:147 👀 Gaze Tracking: {headCommon_x: '-1.571', headCommon_y: '0.000', pointer: 'x:-0.96 y:0.04'}
debug1.tsx:121 🦊 Tail Wagging: {wag: '1.00', tail_y: '0.30', tail1_y: '0.25'}
debug1.tsx:105 💃 Hip Swing: {sway: '-0.100', hips_rotation_z: '-0.100', hips_position_x: '-0.005'}
debug1.tsx:105 💃 Hip Swing: {sway: '0.061', hips_rotation_z: '0.061', hips_position_x: '0.003'}
debug1.tsx:105 💃 Hip Swing: {sway: '0.020', hips_rotation_z: '0.020', hips_position_x: '0.001'}
debug1.tsx:147 👀 Gaze Tracking: {headCommon_x: '-1.571', headCommon_y: '0.000', pointer: 'x:0.51 y:0.55'}
debug1.tsx:147 👀 Gaze Tracking: {headCommon_x: '-1.571', headCommon_y: '0.000', pointer: 'x:-0.62 y:-0.19'}
debug1.tsx:147 👀 Gaze Tracking: {headCommon_x: '-1.571', headCommon_y: '0.000', pointer: 'x:-0.39 y:0.00'}
debug1.tsx:160 🔄 Auto-Rotation: {head_y: '-0.084'}
debug1.tsx:160 🔄 Auto-Rotation: {head_y: '0.108'}
debug1.tsx:160 🔄 Auto-Rotation: {head_y: '0.200'}// Concept for replacing eye mesh material at runtime
// After loading the GLB, find the mesh corresponding to the eye
// Directly replace with MeshPhysicalMaterial
// - transmission: 1 (refraction effect of light passing through)
// - ior: 1.45 (glass refractive index)
// - thickness: 0.5 (material thickness)
// - roughness: 0 (smooth surface)
// Shimmering eye material
const eyeTextures = useTexture(
enhancedEyes
? [
'/character/textures/eyes_color.png',
'/character/textures/eyes_roughness.png',
'/character/textures/eyes_transmission.png',
]
: [],
);
// Eye material replacement
const eyeMaterial = useFundyEyeMaterial(eyeTextures);
useApplyEyeMaterials({ enhancedEyes, eyeMaterial, nodes, materials });
/**
* Hook to apply eye/iris materials to the model
*/
export function useApplyEyeMaterials(params: {
enhancedEyes: boolean;
eyeMaterial?: THREE.Material;
nodes: GLTFResult['nodes'];
materials: GLTFResult['materials'];
}) {
const { enhancedEyes, eyeMaterial, nodes, materials } = params;
useEffect(() => {
const eyeMat = enhancedEyes && eyeMaterial ? eyeMaterial : materials.eye;
const irisMat = materials.iris;
const eyeMeshes = [nodes.Sphere001, nodes.Sphere003].filter(
(mesh): mesh is THREE.Mesh => !!mesh && (mesh as THREE.Mesh).isMesh,
);
const irisMeshes = [nodes.Sphere001_1, nodes.Sphere003_1].filter(
(mesh): mesh is THREE.Mesh => !!mesh && (mesh as THREE.Mesh).isMesh,
);
eyeMeshes.forEach(mesh => {
mesh.material = eyeMat;
mesh.material.needsUpdate = true;
});
irisMeshes.forEach(mesh => {
mesh.material = irisMat;
});
}, [enhancedEyes, eyeMaterial, materials.eye, materials.iris, nodes]);
}// useFixSkinnedMesh.ts
export function useFixSkinnedMesh(scene: THREE.Group | THREE.Object3D) {
useEffect(() => {
if (!scene) return;
scene.traverse(child => {
if (child instanceof THREE.SkinnedMesh) {
// frustumCulled = false : Include elements outside the screen in rendering
child.frustumCulled = false;
// Geometry validation and manual boundingBox correction: Recalculate rendering range with actual size
const geo = child.geometry;
if (geo?.attributes?.position && geo.attributes.position.count > 0) {
try {
if (!geo.boundingBox) geo.computeBoundingBox();
if (!geo.boundingSphere) geo.computeBoundingSphere();
} catch (error) {
console.warn(`Failed to compute bounds for ${child.name}:`, error);
}
}
// Initialize MorphTargets: Reset expression values to initial state
if (child.morphTargetInfluences && child.morphTargetDictionary) {
// Initialize if morphTargetInfluences is undefined
const morphCount = Object.keys(child.morphTargetDictionary).length;
if (child.morphTargetInfluences.length !== morphCount) {
child.morphTargetInfluences = new Array(morphCount).fill(0);
}
}
}
});
}, [scene]);
}/**
* FundyModel.tsx
* Implementation of independent instancing using SkeletonUtils
*/
export const FundyModel = forwardRef<THREE.Group, FundyModelProps>(
({ animation, enhancedEyes = true, trophyHold = false, ...props }, ref) => {
const group = useRef<THREE.Group>(null!);
const [actionClips, setActionClips] = useState<FundyActionClips>({});
// 1. Load GLTF (automatically caches)
const { scene, animations } = useGLTF('/character/model.glb') as unknown as GLTFResult;
// 2. Clone scene: Use SkeletonUtils.clone for independent animation capability on each instance
const clone = useMemo(() => SkeletonUtils.clone(scene), [scene]);
// 3. Re-extract nodes and materials from cloned scene
const { nodes, materials } = useGraph(clone) as unknown as GLTFResult;
// 4. Connect independent AnimationMixer
const { actions, clips, mixer } = useAnimations(animations, group);
// [Omitted: Animation clip mapping logic]
// 5. Apply hybrid optimization
useFixSkinnedMesh(clone); // Hook for rendering error correction
useMorphAnimation(nodes, animation); // Hook for expression (Morph Target) control
return (
<group ref={group} {...props} dispose={null}>
<group name="Scene">
<group name="bone_body">
{/* Render SkinnedMesh and Bone structure */}
<Primitive object={nodes['DEF-spine']} />
<skinnedMesh
name="body"
geometry={nodes.body.geometry}
material={materials.body}
skeleton={nodes.body.skeleton}
/>
{/* ...Other parts */}
</group>
</group>
</group>
);
}
);// Core logic of ORM composition script
const orm = Buffer.alloc(SIZE * SIZE * 3);
for (let i = 0; i < SIZE * SIZE; i++) {
orm[i * 3 + 0] = ao[i]; // AO to R channel
orm[i * 3 + 1] = rough[i]; // Roughness to G channel
orm[i * 3 + 2] = metal[i]; // Metallic to B channel
}
await sharp(orm, { raw: { width: SIZE, height: SIZE, channels: 3
} })
.png({ colours: 256 }) // Optimize size with PNG-8
.toFile(`${name}_ORM.png`);A record of the intense 7-week journey: from improving onboarding and infrastructure monitoring to implementing real-time sockets and 3D character optimization.

My experience during the OSCCA challenge phase, including raising issues and making first Pull Request while exploring the Githru project.

A reflection on a 6-week team sprint: covering architectural challenges, the nuances of collaboration, and technical growth through senior feedback.

A record of the emergence, advantages, and disadvantages of UI architecture patterns (MVC, MVP, MVVM, Flux), and their comparative analysis.
A record of the issues faced when putting characters on Three.js for the Funda project and personal portfolio
A 7-month journey from Basic to Group Projects: mastering CS fundamentals, discovering the essence of software design, and evolving through AI engineering
A record of the intense 7-week journey: from improving onboarding and infrastructure monitoring to implementing real-time sockets and 3D character optimization.
A record of building the foundation: from ideation and prototyping to navigating senior feedback and implementing the MVP
An in-depth look at why we normalize vectors, connecting game movement logic with Blender's "Apply Scale."
A reflection on a 6-week team sprint: covering architectural challenges, the nuances of collaboration, and technical growth through senior feedback.
A reflection on the 10-week Boostcamp membership sprint: technical learning, design challenges, burnout, and lessons about using AI effectively.
A personal retrospective on the Boostcamp Web·Mobile Challenge phase: daily missions, CS learning, peer feedback, teamwork, and how I learned to grow alongside AI
A record of exploring the pros and cons of functional programming and object-oriented programming, and the reasons for choosing functional programming in React